This blog details the process of deploying flask app using docker on Google Cloud Platform (Cloud Build, Cloud Container Registry and Cloud Run) with CI/CD pipeline setup.
Creating Simple Flask App
1. Create app.py
from flask import Flask, Response, jsonify, render_template, logging, request
app = Flask(__name__)

@app.route('/')
def home():
    return render_template('index.html')

if __name__ == '__main__':
    app.run(host='0.0.0.0', port=80)
2. Create index.html inside templates folder
<!DOCTYPE html>
<html lang="en">
<head>
    <meta charset="UTF-8">
    <meta http-equiv="X-UA-Compatible" content="IE=edge">
    <meta name="viewport" content="width=device-width, initial-scale=1.0">
    <title>Document</title>
</head>
<body>
    <h1>hello world!</h1>
</body>
</html>
3. Create Dockerfile
FROM python:3.8

ENV PORT 80
ENV HOST 0.0.0.0

EXPOSE 80

RUN apt-get update -y && \
    apt-get install -y python3-pip

COPY ./requirements.txt /app/requirements.txt

WORKDIR /app

RUN pip install -r requirements.txt

COPY . /app


ENTRYPOINT ["python", "app.py"]
4. Create requirements.txt using pip freeze -r > requirements.txt
Flask==1.1.2
5. Run docker build . to build docker image
NOTE:Install Docker to use docker command
6. Get IMAGE ID using docker images

Setting up GCP and GitHub
7. Create a new project on GCP
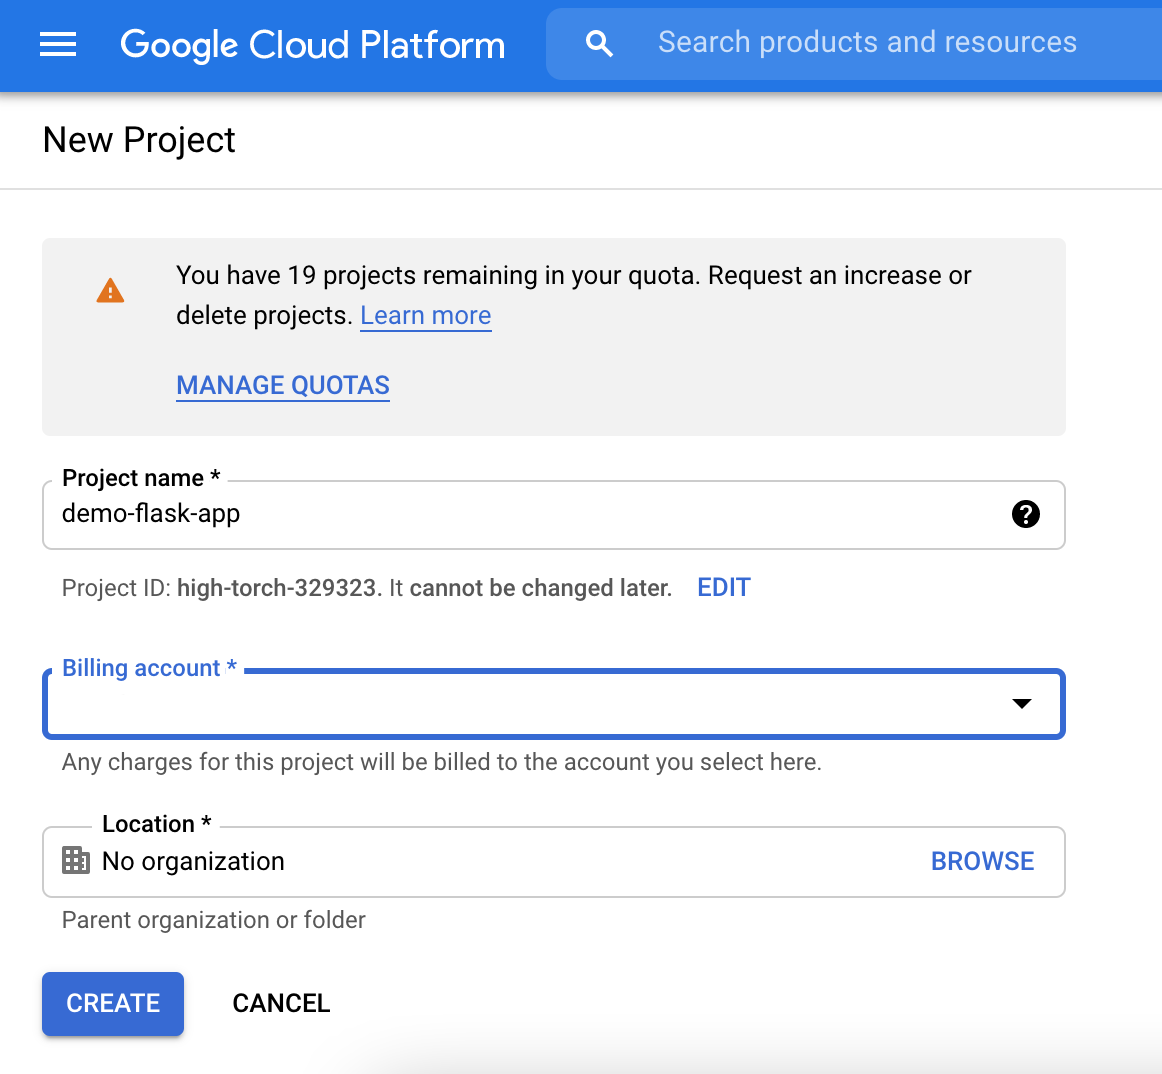 Fill in Project name > Select Billing account > CREATE
8. Create a new repo on Github
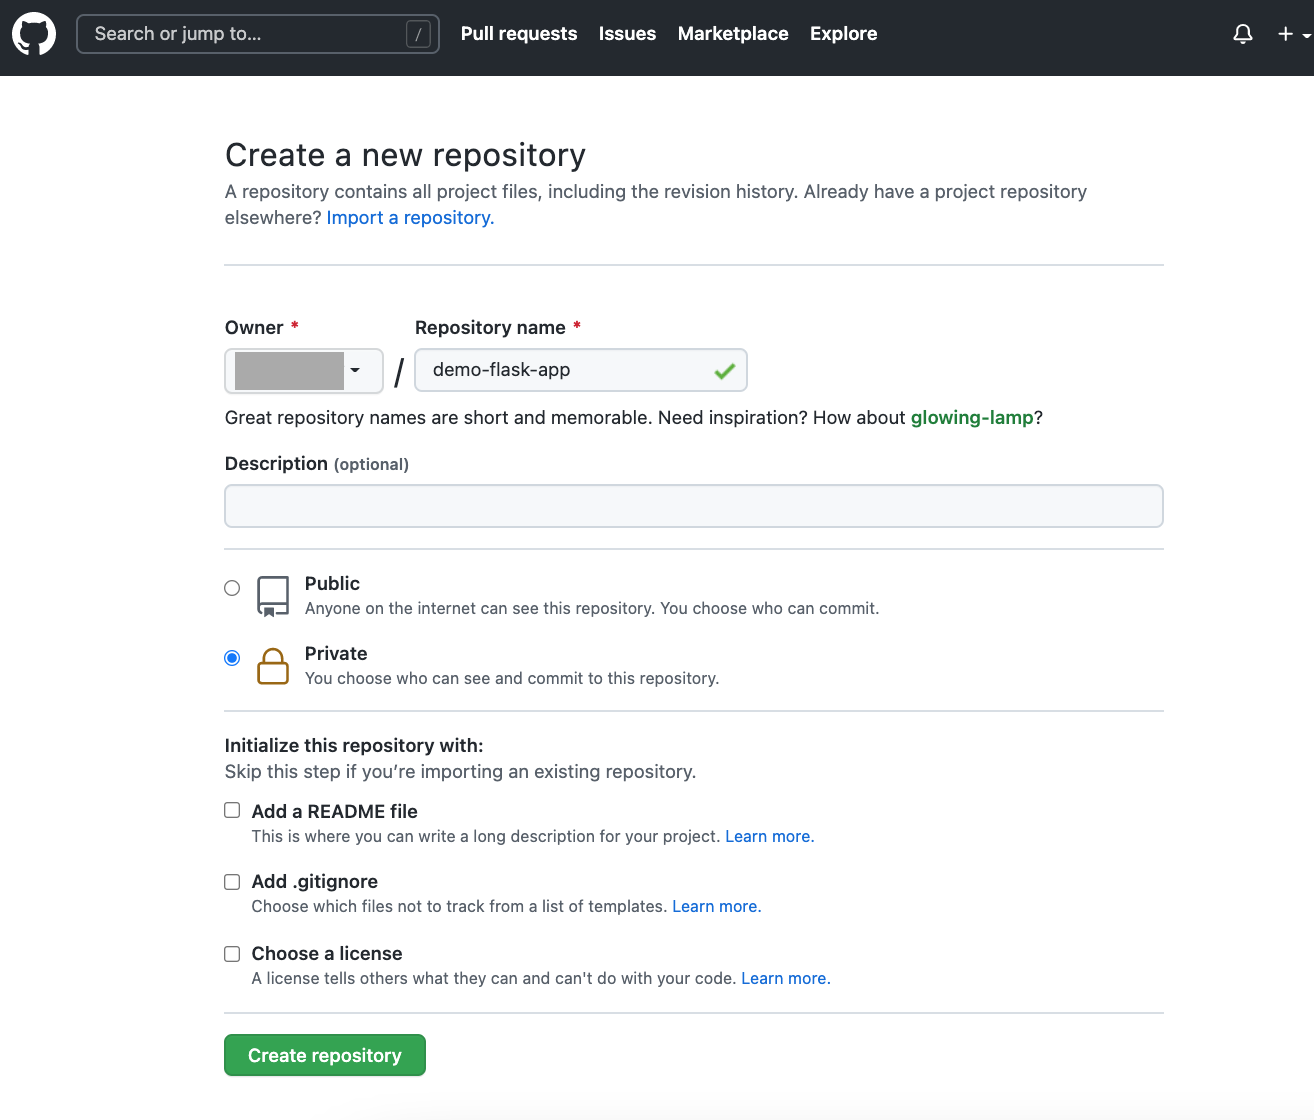 Fill in Repository name > Create repository
Uploading Docker image on GCP (Container Registory)
9. Add a tag to the docker image that you just created docker tag <imageid> gcr.io/<gcp-project-id>/<projectname>

Run docker images to check if the image is tagged.

10. Run gcloud init to check if you are in the right GCP project
NOTE:Install gcloud to use gcloud command
11. Run gcloud auth configure-docker to add credentials
12. Enable Container Registry on GCP
13. Run docker push gcr.io/<gcp-project-id>/<projectname> to push the docker image to GCP Container Registry
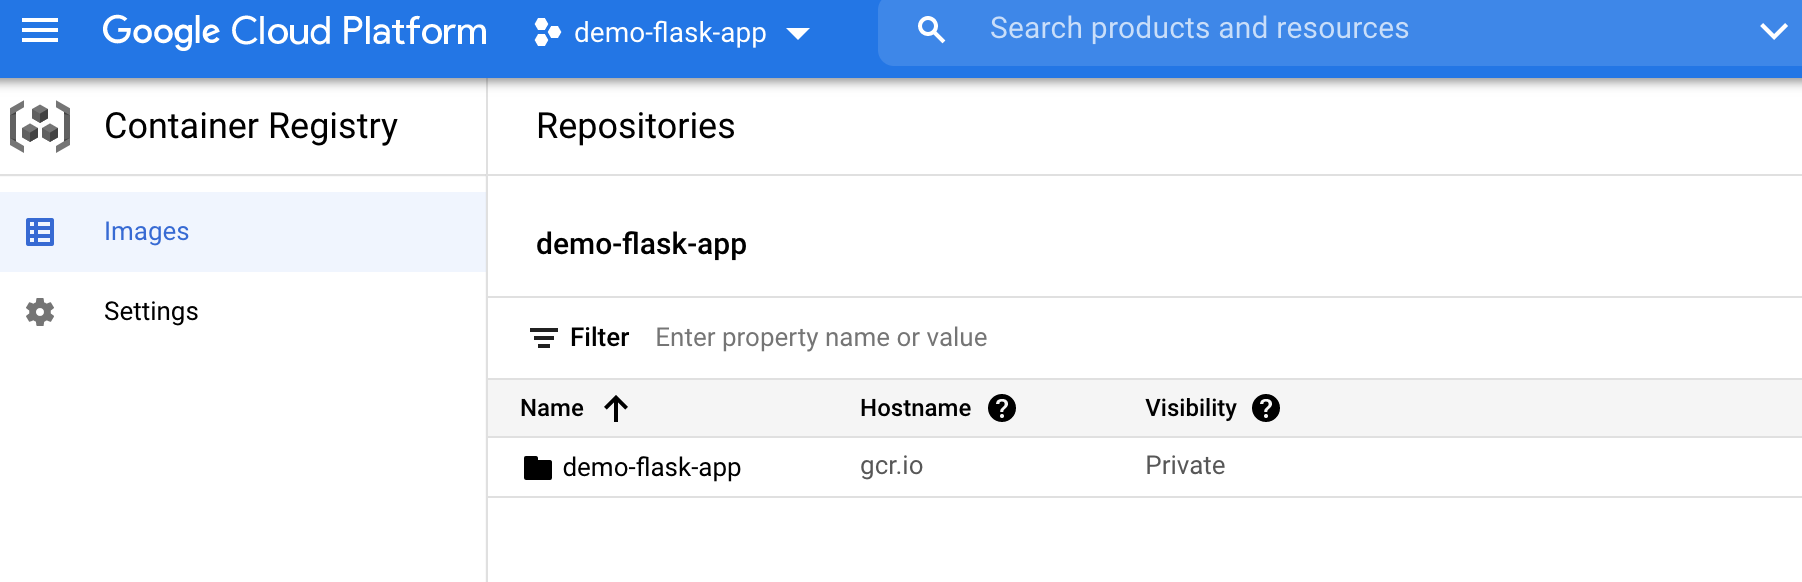
 Check Container Registry if the image is uploaded
14. Enable Cloud Build on GCP
15. Go to Cloud Run, Create service
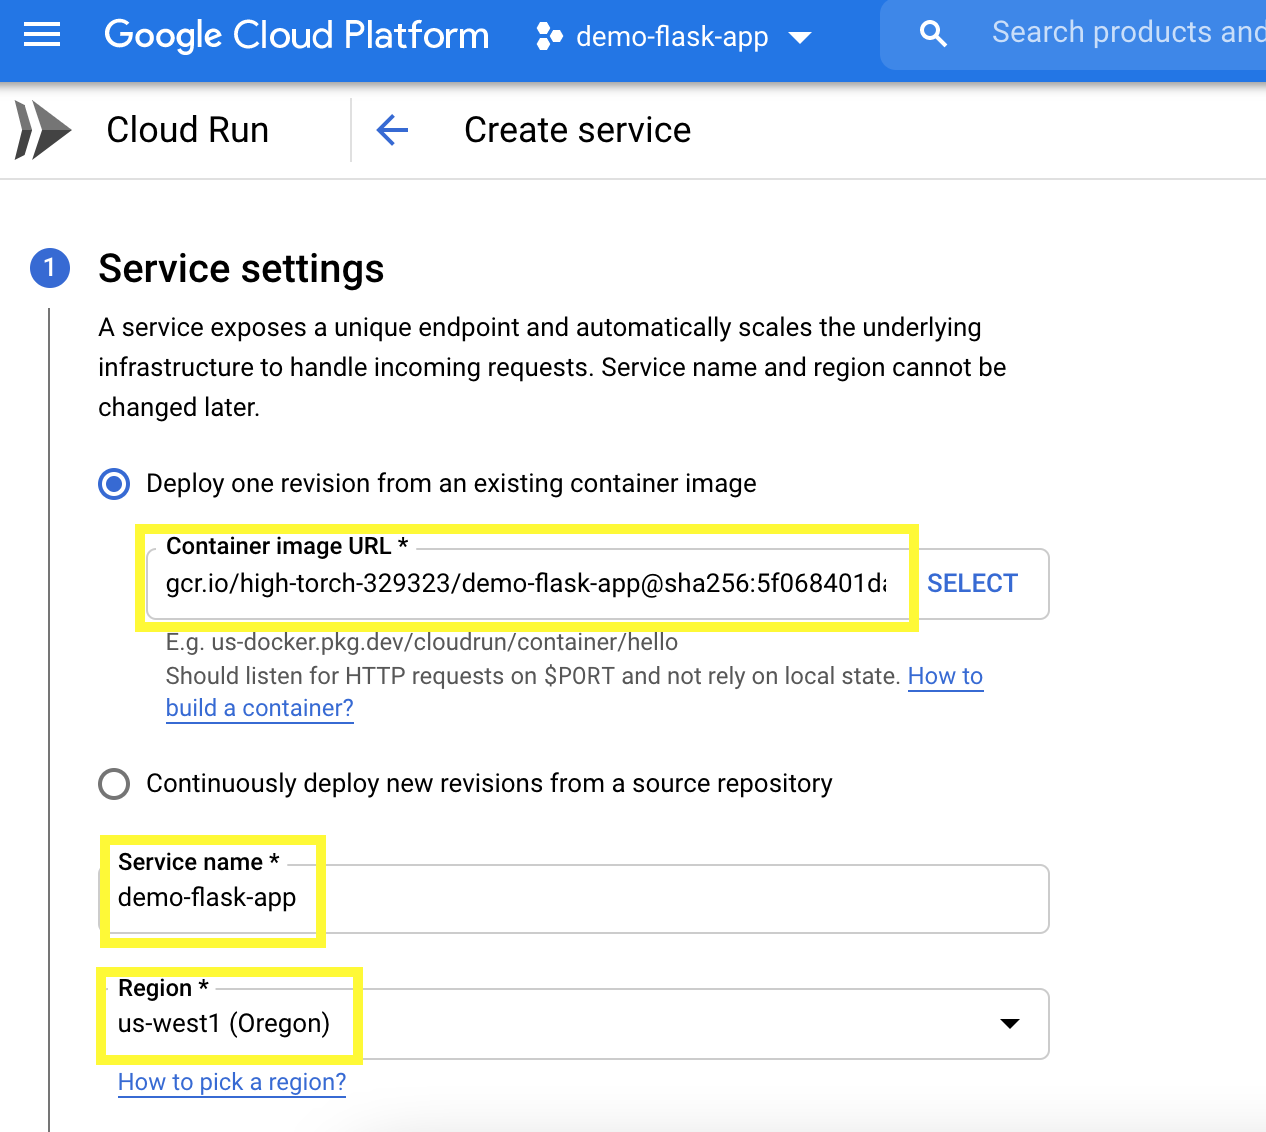
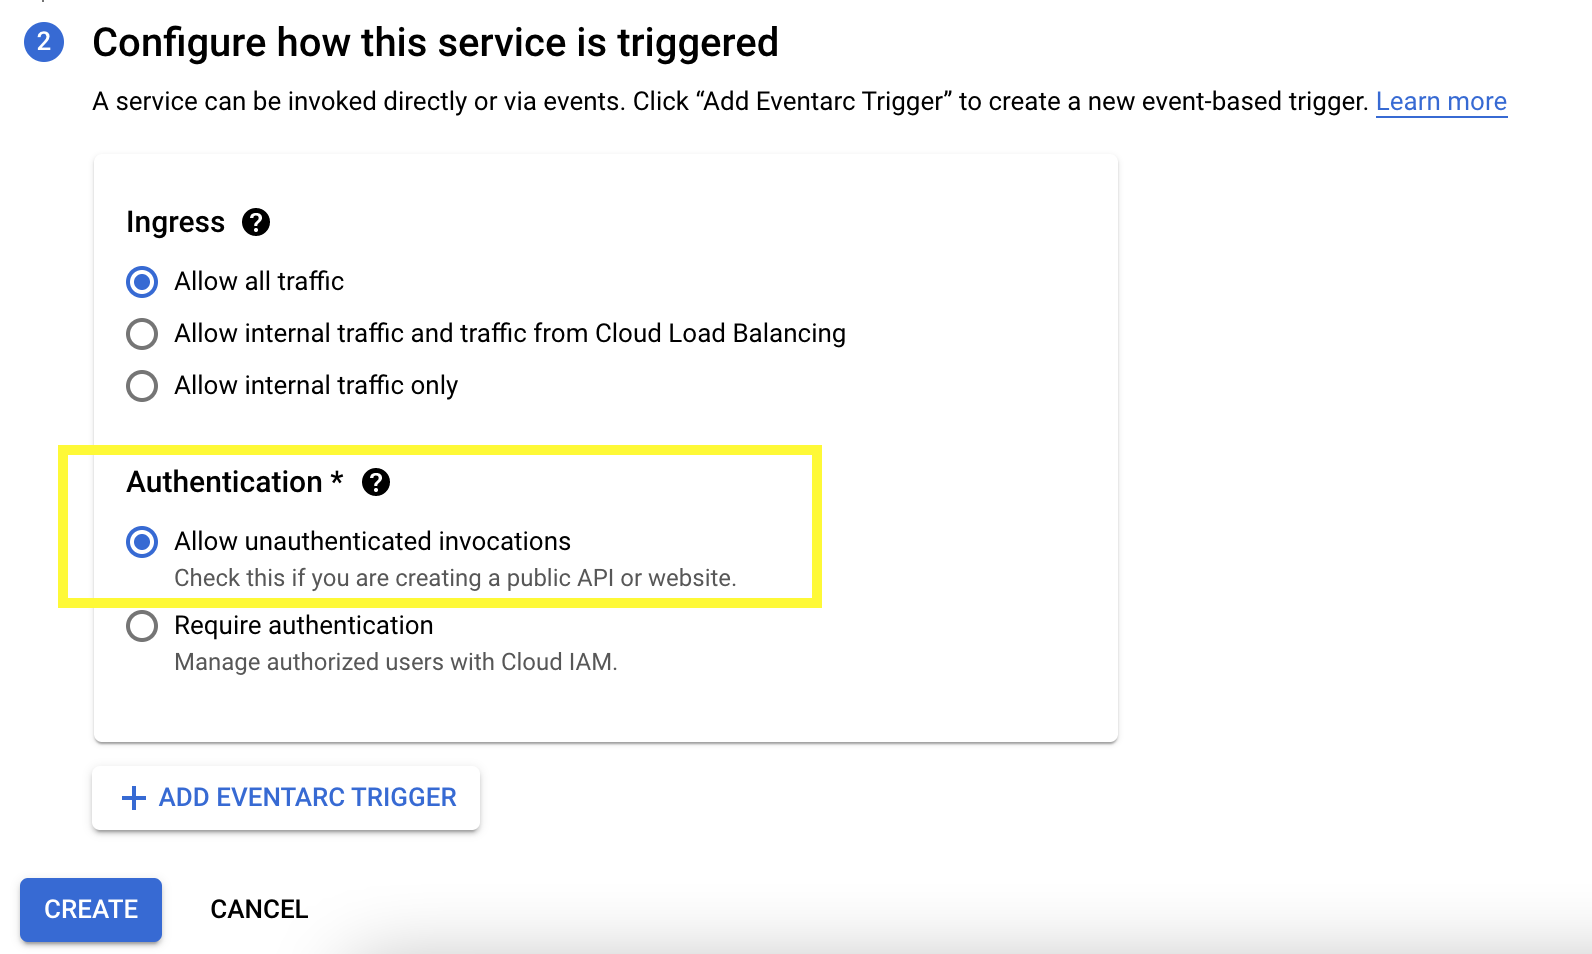 Select Container image (select latest) >Fill in Service name > Select Region (my preference is us-west1) > Under Authentication, Select Allow unauthenticated invocations > Create
16. Click Edit & Deploy new revision
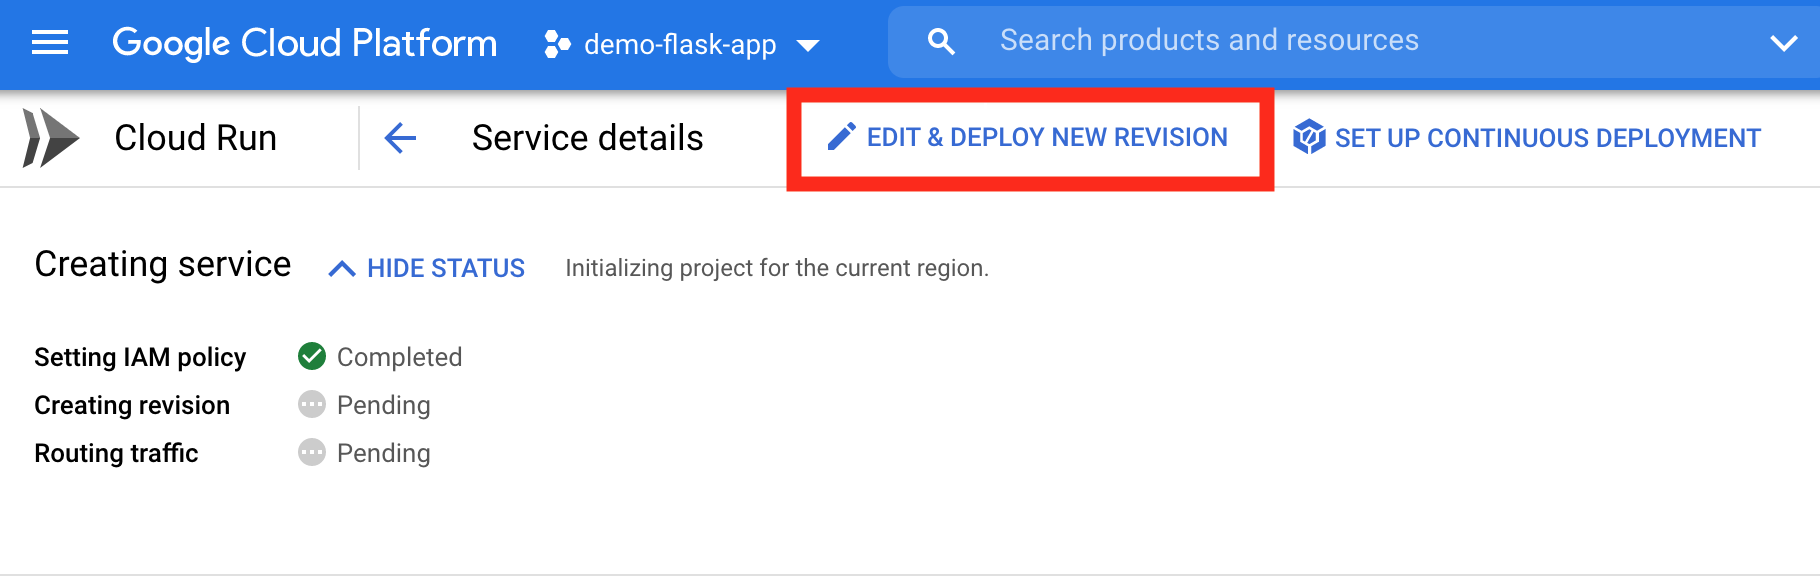 Container tab > Change Container port to 80 > Under Autoscaling, change maximum to 1 > Deploy
When Green icon appears, Access the website from the url on Cloud Run
You will see something like this!
Container tab > Change Container port to 80 > Under Autoscaling, change maximum to 1 > Deploy
When Green icon appears, Access the website from the url on Cloud Run
You will see something like this!

Setting Up Continuous Deployment
17. Create cloudbuild.yaml
(Reference: https://cloud.google.com/build/docs/deploying-builds/deploy-cloud-run#building_and_deploying_a_container)
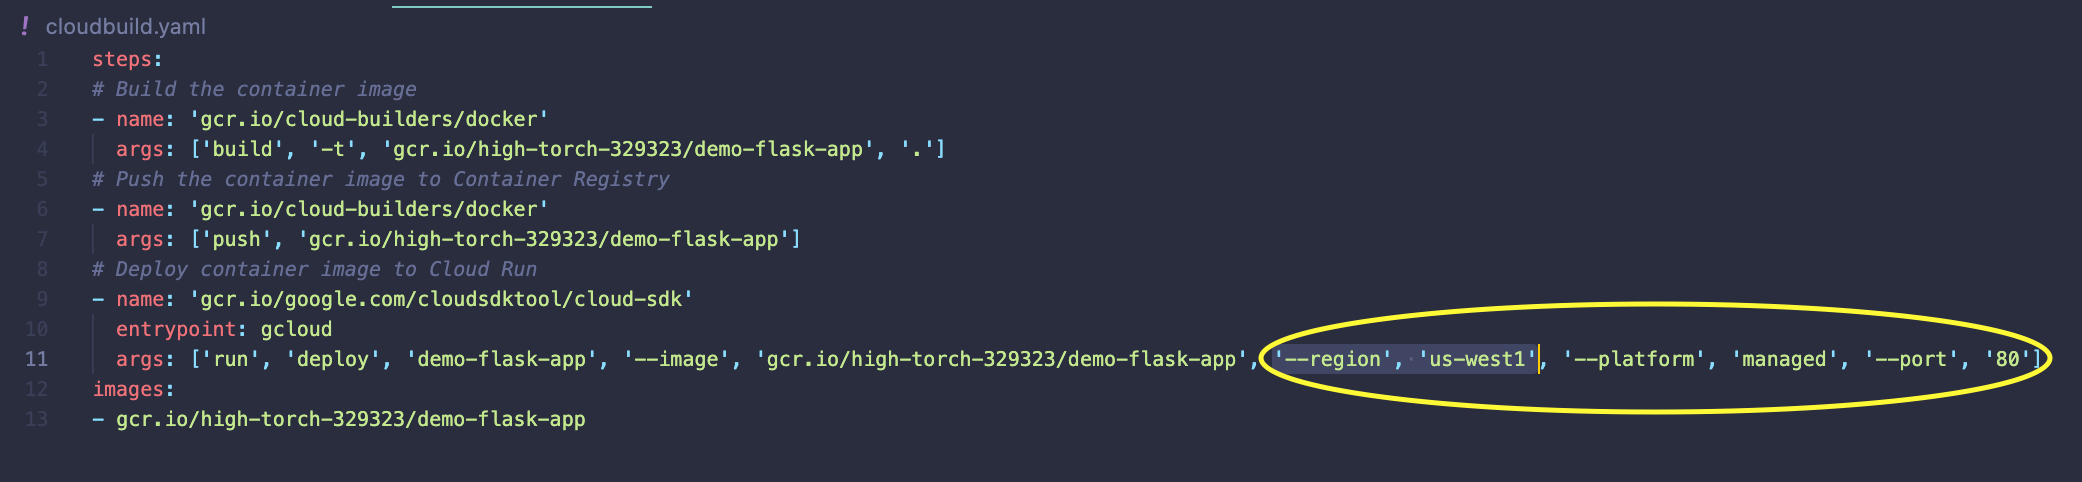 Update and add
 '--region', 'us-west1', '--platform', 'managed', '--port', '80' to args for Cloud Run
Option: Change title on index.html to see the chagne later
18. Push the file to GitHub
git init
git remote add origin your-repo-url
git add .
git commit -m “first commit”
git push origin master
19. Go to Cloud Build, Create Trigger from Triggers tab
Fill in Name > Under Source Repositry, Select your Github Repo > Under Configuration Type, Select Cloud Build configuration file > Create
This trigger is listening for any time that we make a commit to the Github Repo.
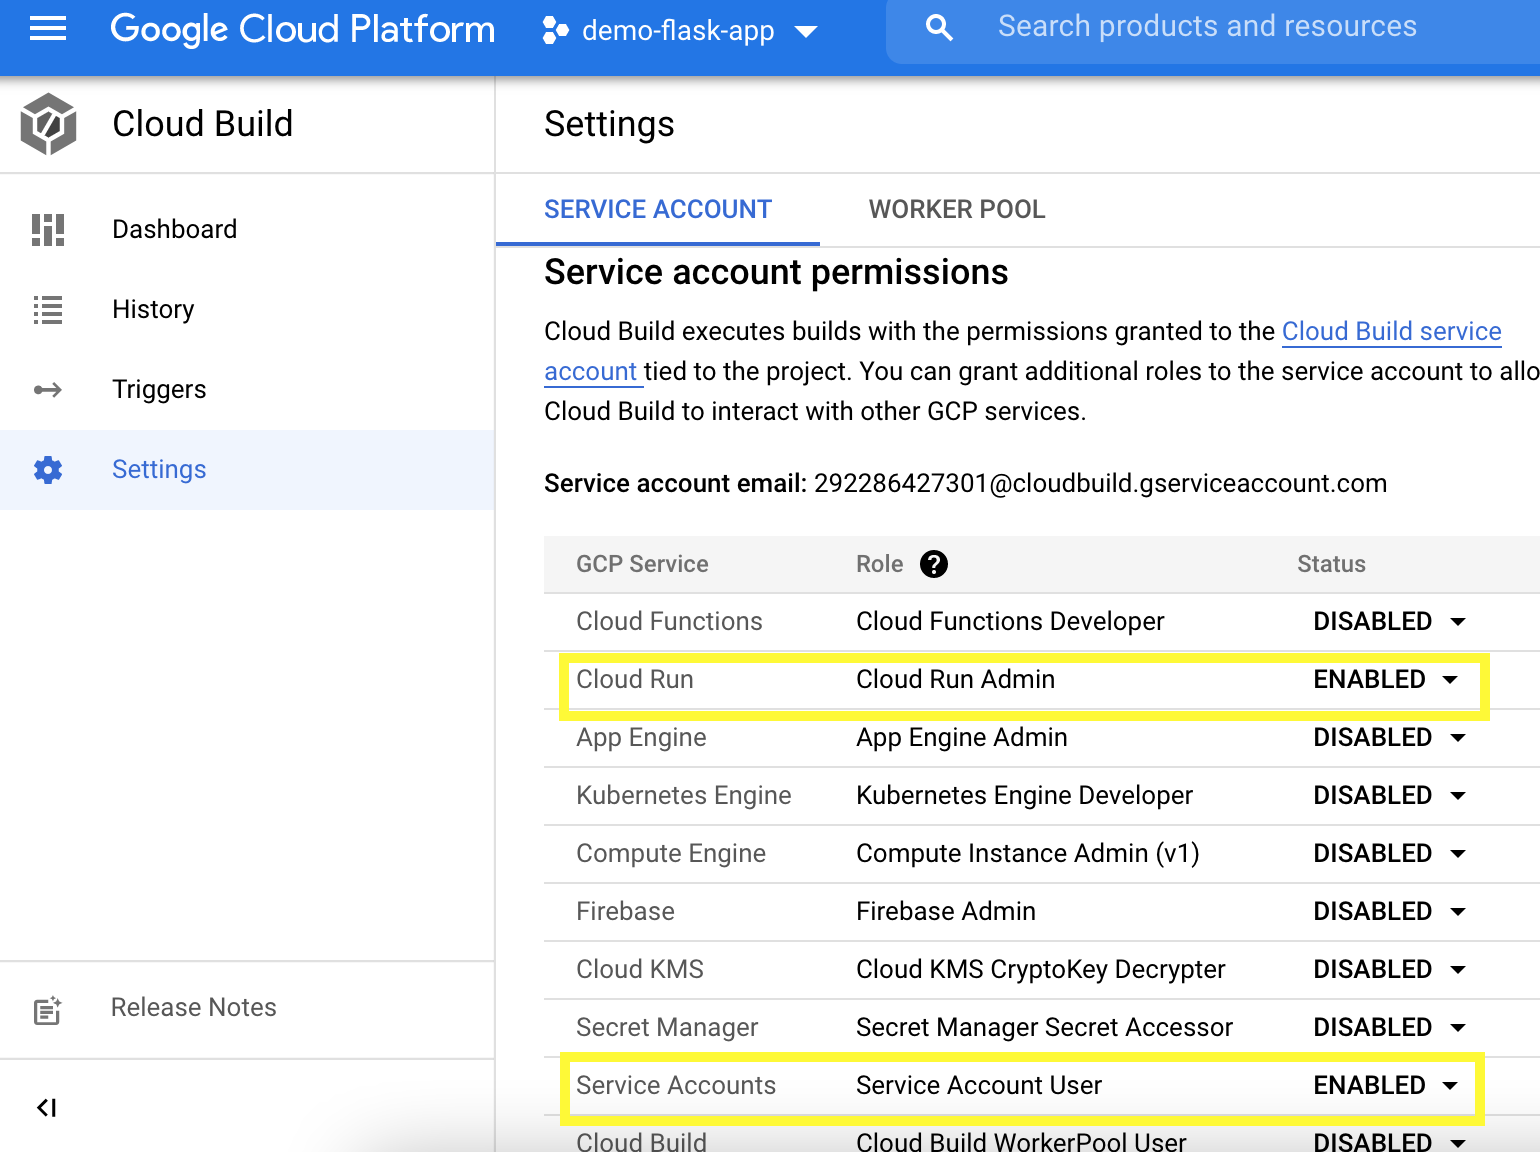
Option: Try RUN > Run Trigger > Check History tab > When it failed, Go to Settings tab > Enable Cloud run admin and service accounts > Go back to Triggers > RUN again